Building the Frog Sounds QRP Kit: First Look
Recently I became interested in amateur radio. I'm currently studying for my license and learning morse code, or "CW" as the radio amateurs call it. Since I started from scratch equipment-wise, I wanted to buy a cheap radio transceiver to start off with. A kit was a perfect match for me since I like to tinker with electronics and there are some really cheap ones out there.
I finally settled for the Frog Sounds QRP Kit with an extruded aluminum case. I paid USD $12.33 for the kit and USD $11.08 for the case. Shipment was free for both.
But first, what does this CW tranceiver do? It's a box that sends a 7.023 MHz radio tone on the air when a key is pressed. If there is a 7.023 MHz radio tone on the air, it sends a 700 Hz beep to a speaker. If you and a friend have one of these each, you can communicate with each other using morse code.
Some features of the Frog Sounds QRP Kit are:
- CW mode only
- 1.8 W transmit power
- Fixed frequency in the 40m ham band: 7.023 MHz (crystals can be replaced)
- DC barrel jack for 9-12 V DC power supply
- BNC connector for 50 ohm antenna
- 3.5 mm jack for telegraph key
- 3.5 mm jack for audio output
- Bi-color LED indicating reception or transmission
- Sidetone frequency around 700 Hz, adjustable
- Few components
- Very cheap!
The kit came with a schematic and a list of components. I found a PDF with build instructions online (it was not included in the kit). The instruction document was hard to read due to the rugged English, but gave me some insights in the desin of the trancseiver. For a kit this cheap, I was prepared to have to figure out how to build it myself anyway.
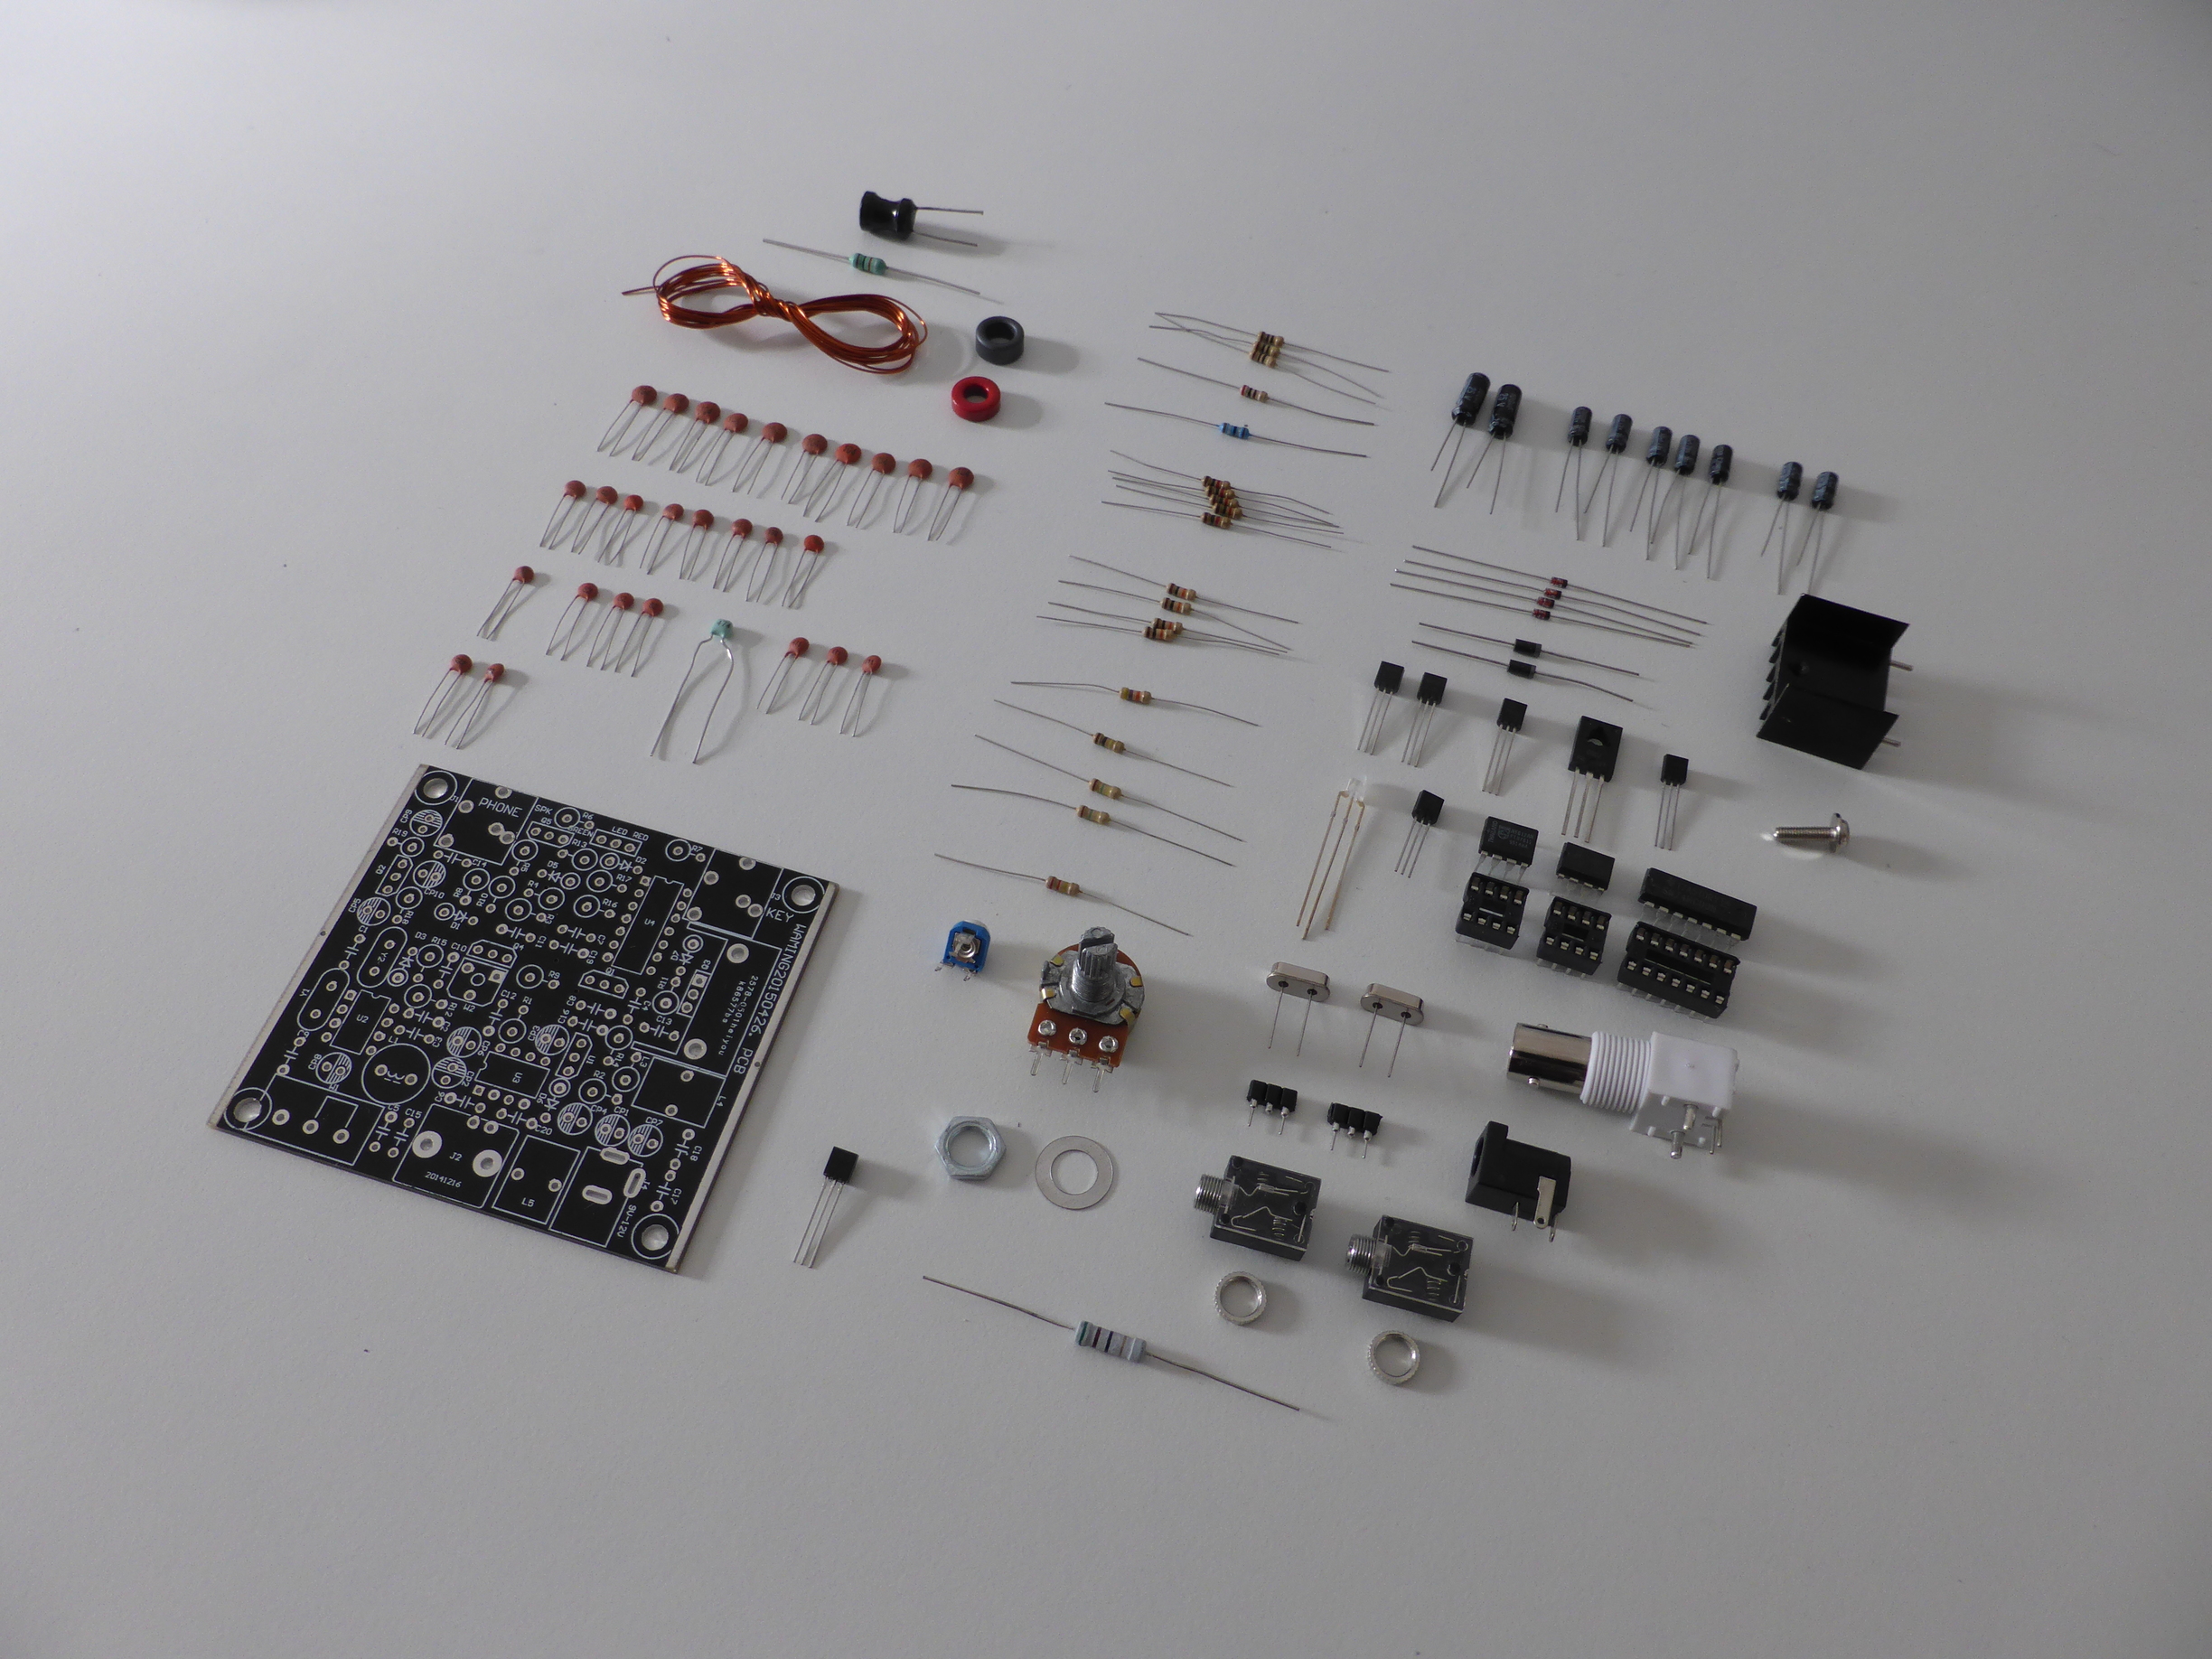
I poured out the components from their bags and checked the component list. All the components were included. I even got an extra resistor, seven extra capacitors, and an extra transistor. Curiously, the transistor was of a type that was not used in the kit.
The 7.023 MHz frequency is popular among hams in China apparently. I decided to add low profile female break away headers for the two crystals. That way I should be able to switch them for others easily later on, if I feel like it.
I took a look at the schematic to try to figure of how the transceiver worked. With the help of some datasheets I could identify these blocks and key components:
- 6 V linear regulator power supply, built around an 78L06
- Local oscillator and mixer, built around an NE602
- Audio amplifier, built around an LM386
- Bi-color LED transmit/receive indicator
- Some NAND gates to buffer the telegraph key
- RF amplifier, built on two common emitter transistor stages
My plan is to build the kit one block at a time. Hopefully I should be able to build, test and make a post for each of the blocks. At the time of writing, I have actually already soldered the parts related to the power supply block, seen that it works, and discovered some interesting details about it. I also have a rough hand drawn version of the schematic that I would like to CAD up in Eagle.
Please post a comment if you like this and if you would to see some more post about this kit. See you on the æther soon!
DE RAEK 73
Comments
Comments are hosted on the same server as this blog. The server resides in the EU and no data is shared with third parties.